
QRPay Payment Gateway for WooCommerce: Installation Guide
Follow these steps to install QRPay WooCommerce plugin:
- Installation:
- Minimum Requirements:
- WordPress 5.9 or greater
- WooCommerce 6.9 or greater
- PHP version 7.4 or greater
- PHP Architecture 64 bits
- MySQL version 5.6 or greater
- Automatic installation:
- Log in to your WordPress dashboard.
- Navigate to the Plugins menu and click on Add New.
- In the search field, type "QRPay Payment Gateway for WooCommerce" and click Search Plugins.
- Once you find the plugin, you can view details such as the version, rating, and description.
- Click Install Now to add the plugin to your site.
- Then click on Active to activated the plugin.
- Manual installation:
- Configure the Plugin Settings:
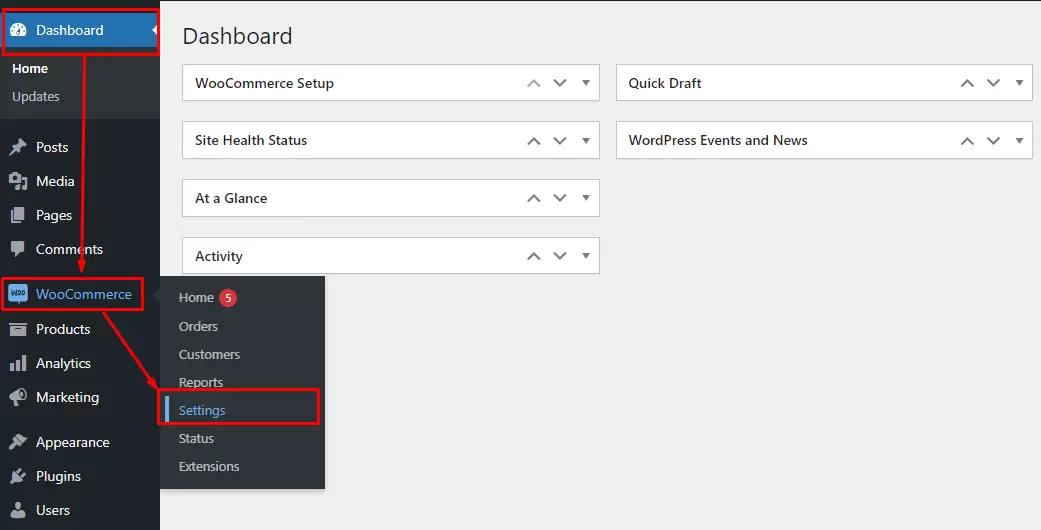
- After activation, navigate to "WooCommerce" > "Settings" in the WordPress dashboard.
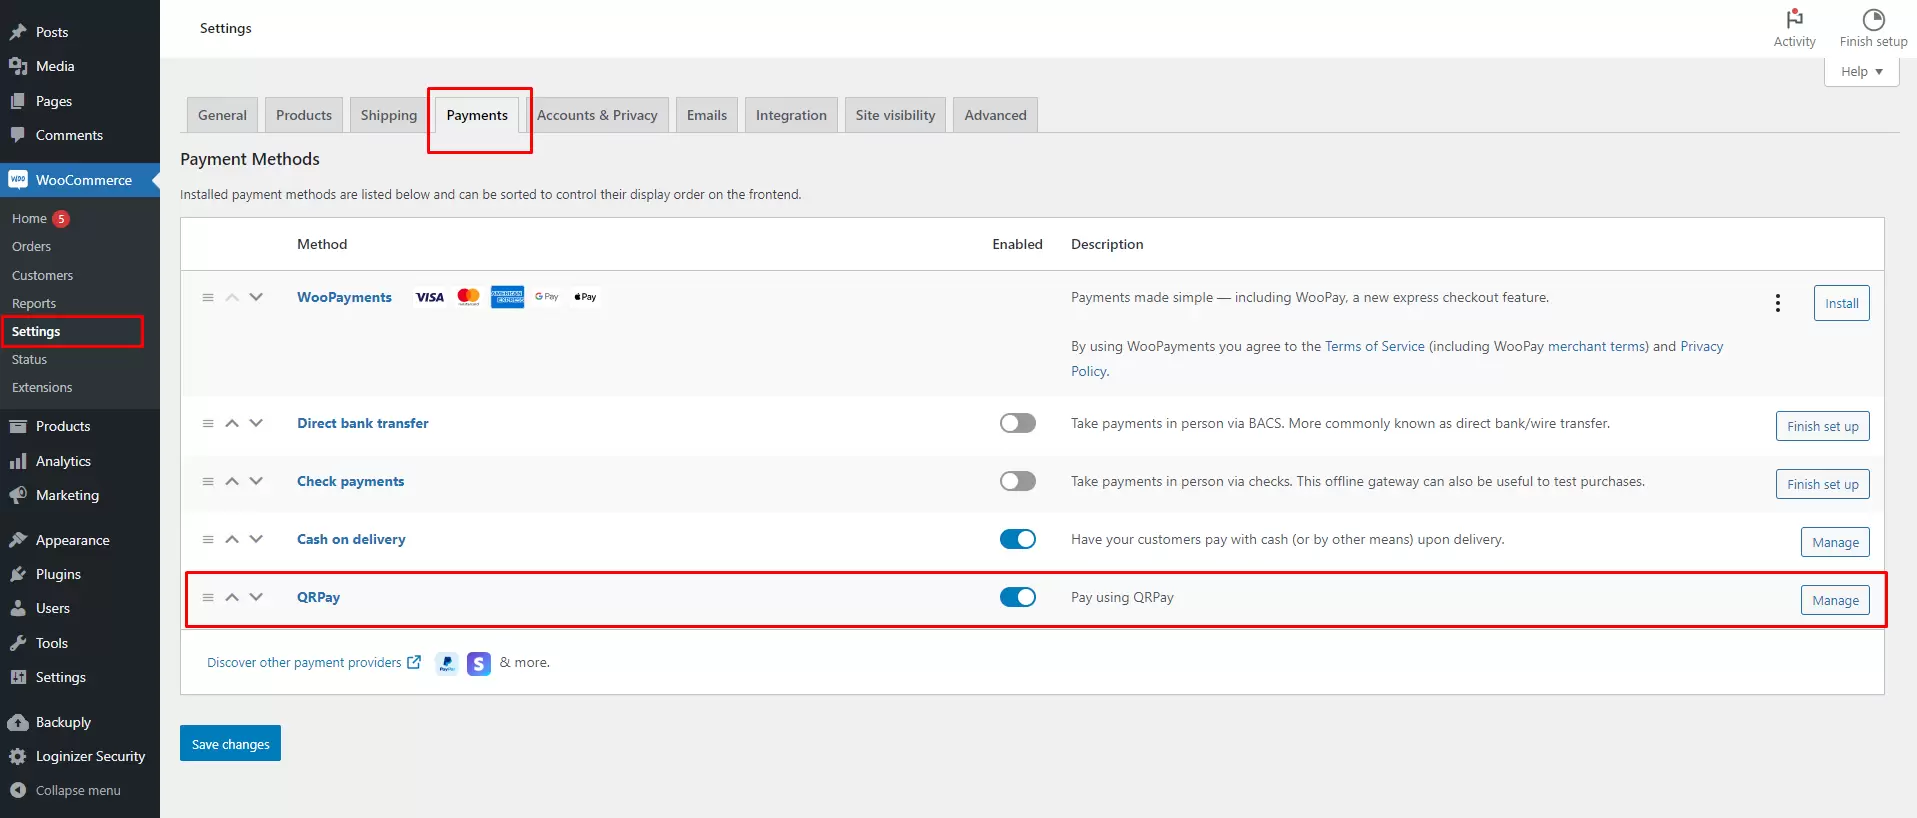
- Look for the "Payments" tab, and you'll see the QRPay option listed among the payment gateways.
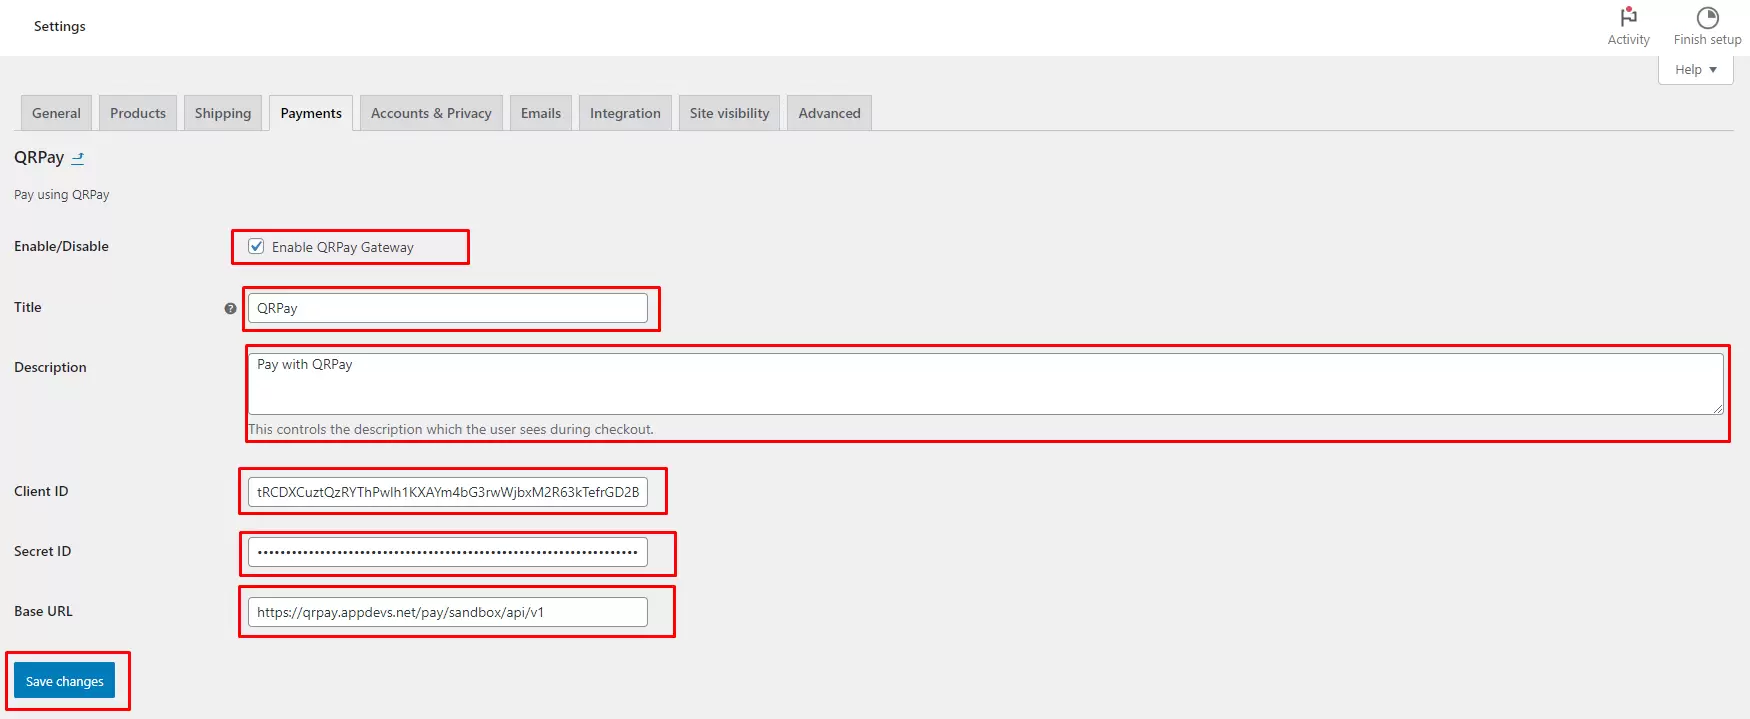
- Click on "QRPay title" or "Manage Button" to configure this settings then inputting "Title", "Description", "Client ID", "Secret ID", "Base URL" and click on Save changes to complete the gateway configuration. and also you can Enable/Disable this gateway from here.
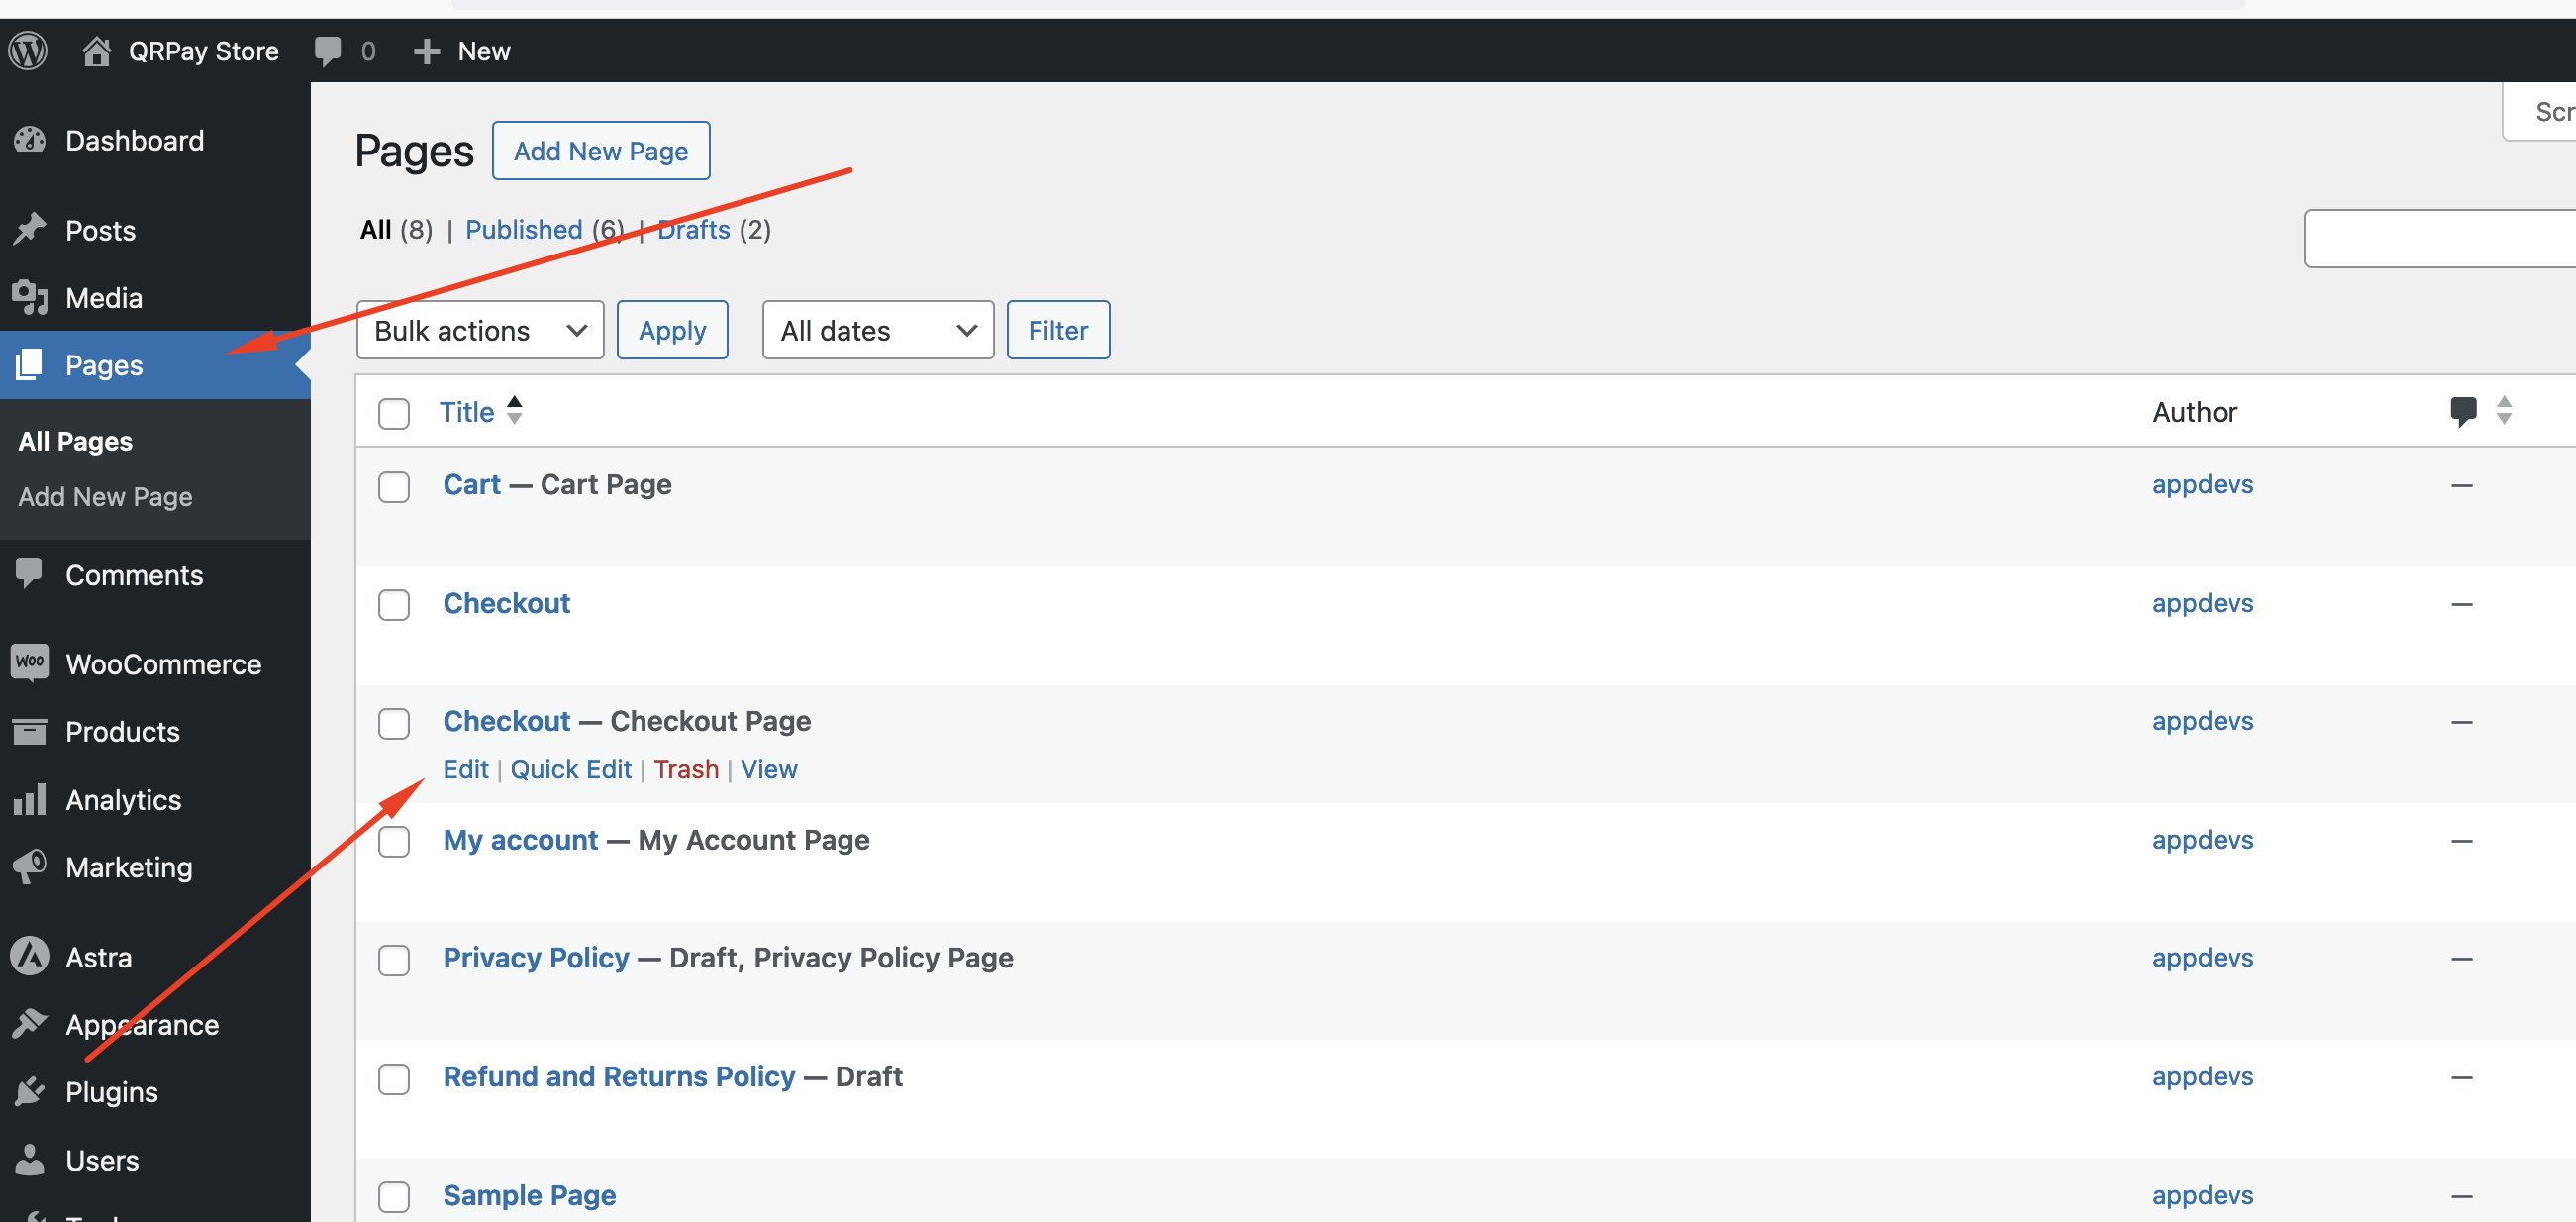
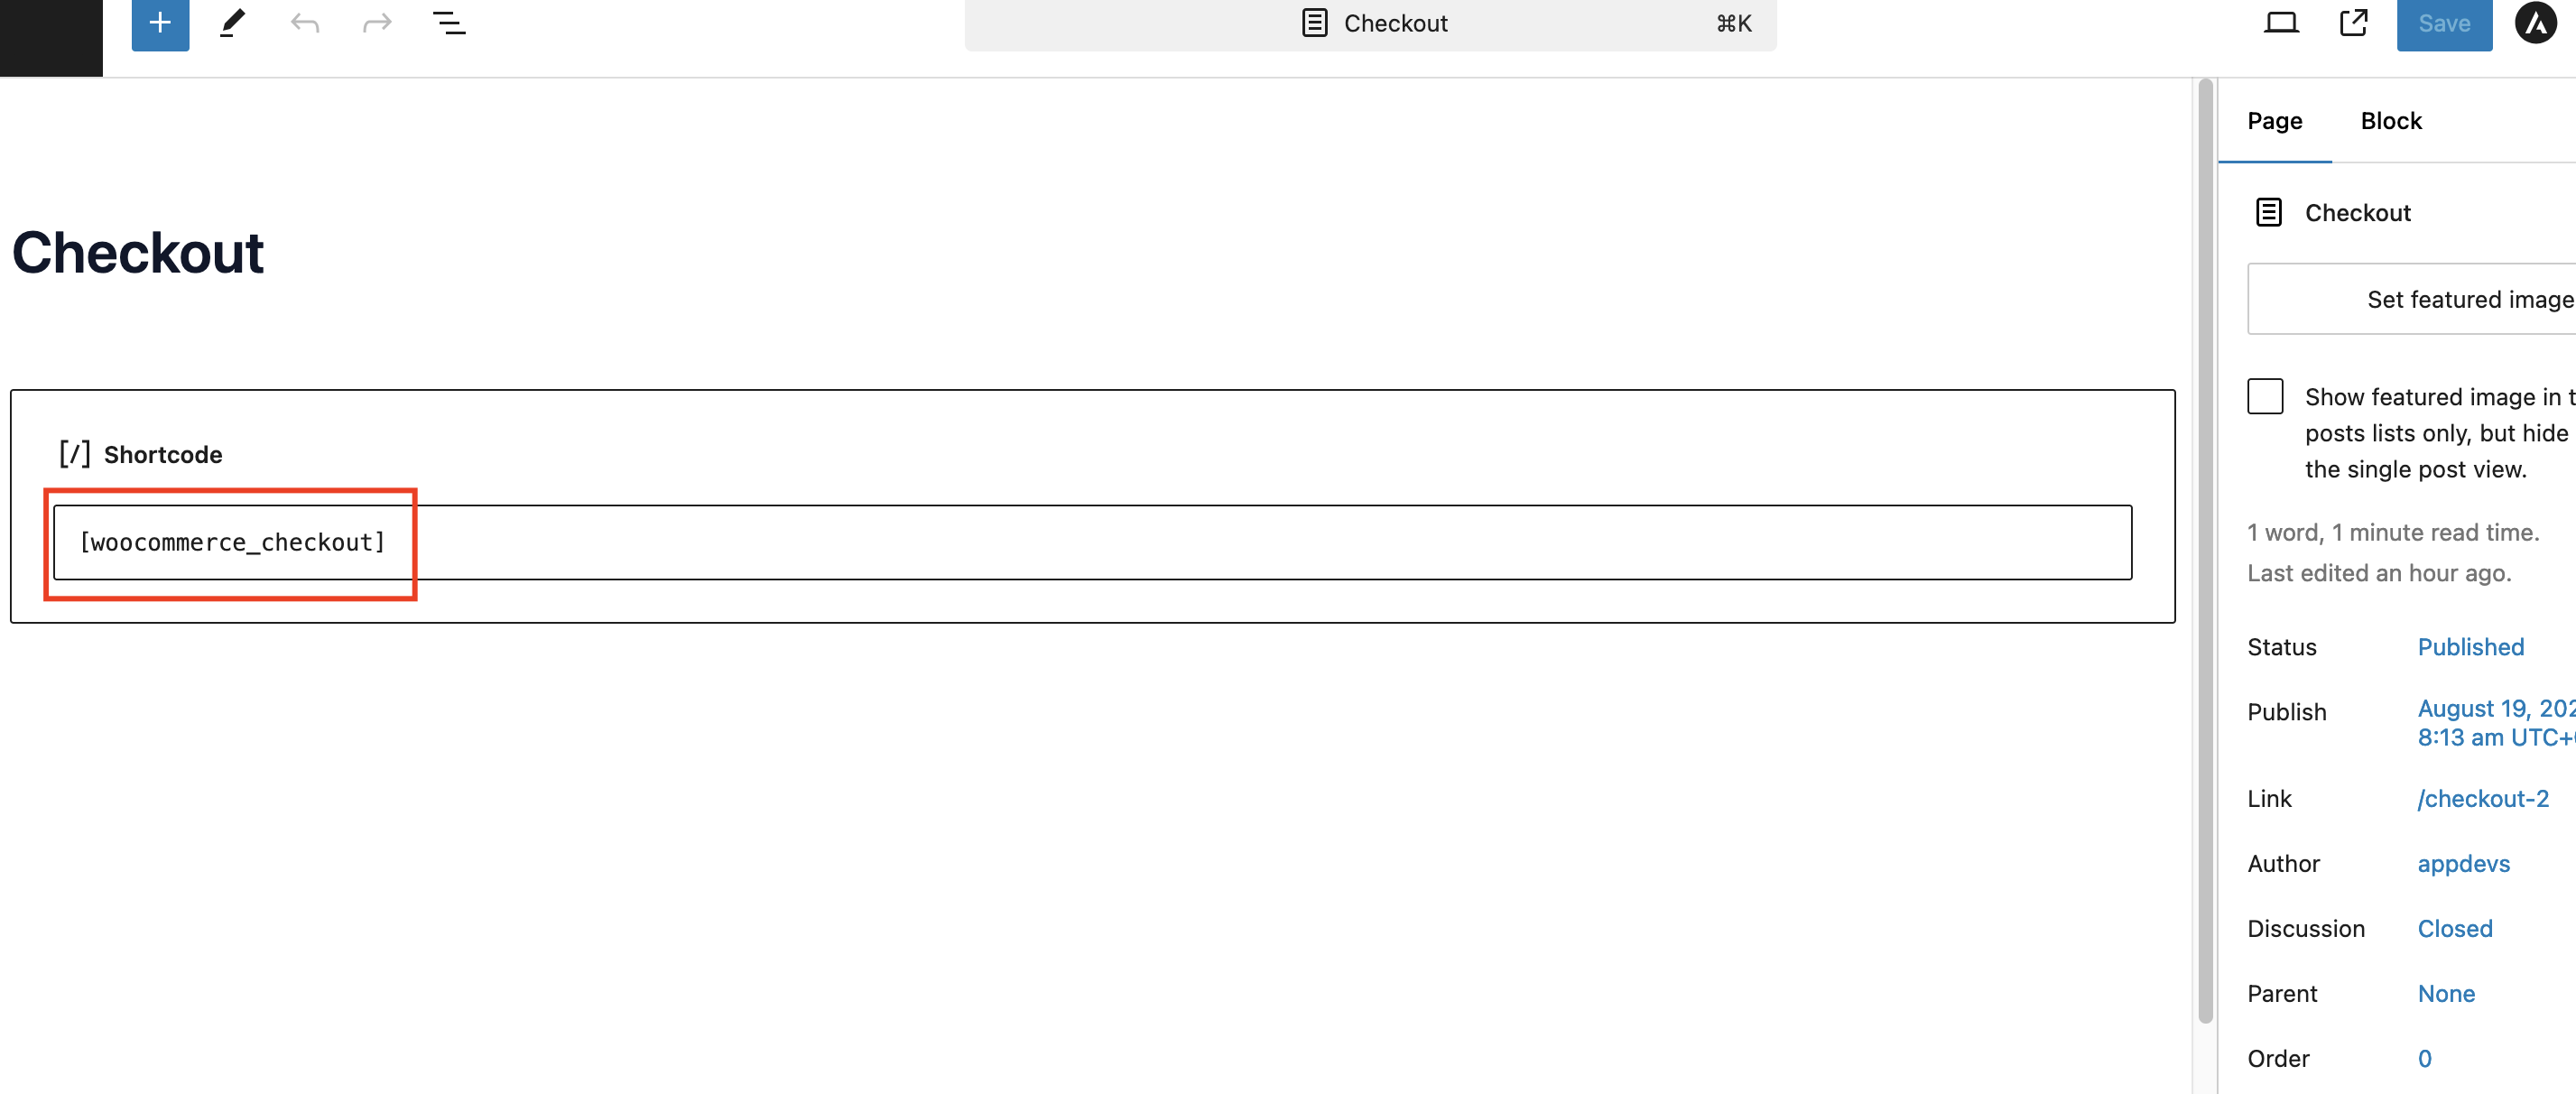
- Then navigate to "WooCommerce" > "Pages" > "Plugins" in the WordPress dashboard.
- Here you can find Checkout - Checkout Page Click on Edit Button.
- Then, you will see the Checkout page. On this page, you need to input the "Shortcode," which is "[woocommerce_checkout]" then Click on Save button.
- Test the Payment Gateway:
- To ensure the plugin is working correctly, run a test transaction on your site.
- Add a product to the cart, proceed to checkout, and select QRPay as the payment method.
- Complete the checkout process to verify that the payment is processed correctly.
- Go Live:
- Once you're satisfied with the test results, the plugin is ready to go live.
- Inform your customers about the new QRPay payment option available on your WooCommerce store.
- Troubleshooting Tips:
- Plugin Installation Error: If the plugin fails to install, ensure your WordPress version is compatible with the plugin.
- Activation Issues: Double-check that the plugin is correctly activated in the "Plugins" section.
- Payment Errors: Verify that your QRPay credentials (API key, Merchant ID) are correctly entered in the settings.
For a comprehensive list of server requirements, please refer to the WooCommerce server requirements documentation .
The automatic installation is the most straightforward method, as WordPress manages the file transfers, allowing you to complete the installation without leaving your web browser. To automatically install the QRPay Payment Gateway for WooCommerce plugin:
Manual installation involves downloading the plugin and uploading it to your web server using an FTP application. For detailed instructions on how to do this, please refer to the WordPress Codex .
This should guide you through the installation and setup of the QRPay WooCommerce Plugin.
Note: For assistance with installation or any issues related to the QRPay Payment Gateway for WooCommerce plugin, please visit our AppDevs Support . Our support team is ready to help you with any queries or challenges you may encounter.