

QRPay Payment Gateway for WooCommerce: Installation Guide
Follow these steps to successfully integrate the QRPay payment gateway into your WooCommerce store.
Step 1: Minimum Requirements
Ensure your server environment meets these criteria before installation:
- WordPress 5.9 or greater
- WooCommerce 6.9 or greater
- PHP version 7.4 or greater (64-bit architecture)
- MySQL version 5.6 or greater
See full WooCommerce server requirements .
Step 2: Locate the Plugin File
After purchasing QRPay, download the main package from CodeCanyon. Inside the main-files folder, locate:
qrpay-gateway-for-woocommerce-[version].zip
Step 3: Installation & Activation
Method A: WordPress Upload (Recommended)
- Log in to your WordPress Admin Panel.
- Go to Plugins → Add New → Upload Plugin.
- Choose the zip file located in Step 2 and click Install Now.
- Click Activate Plugin once the upload is complete.
Step 4: Configure Plugin Settings
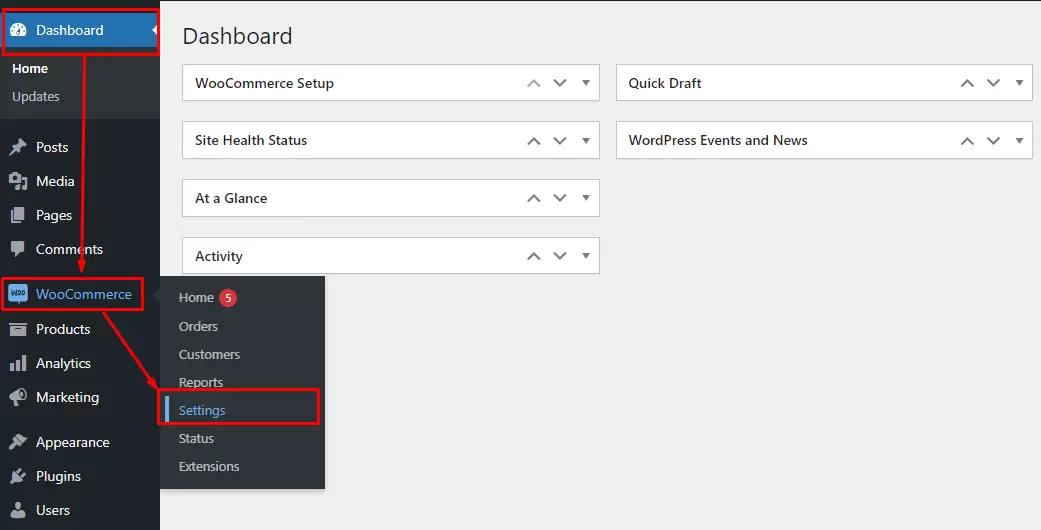
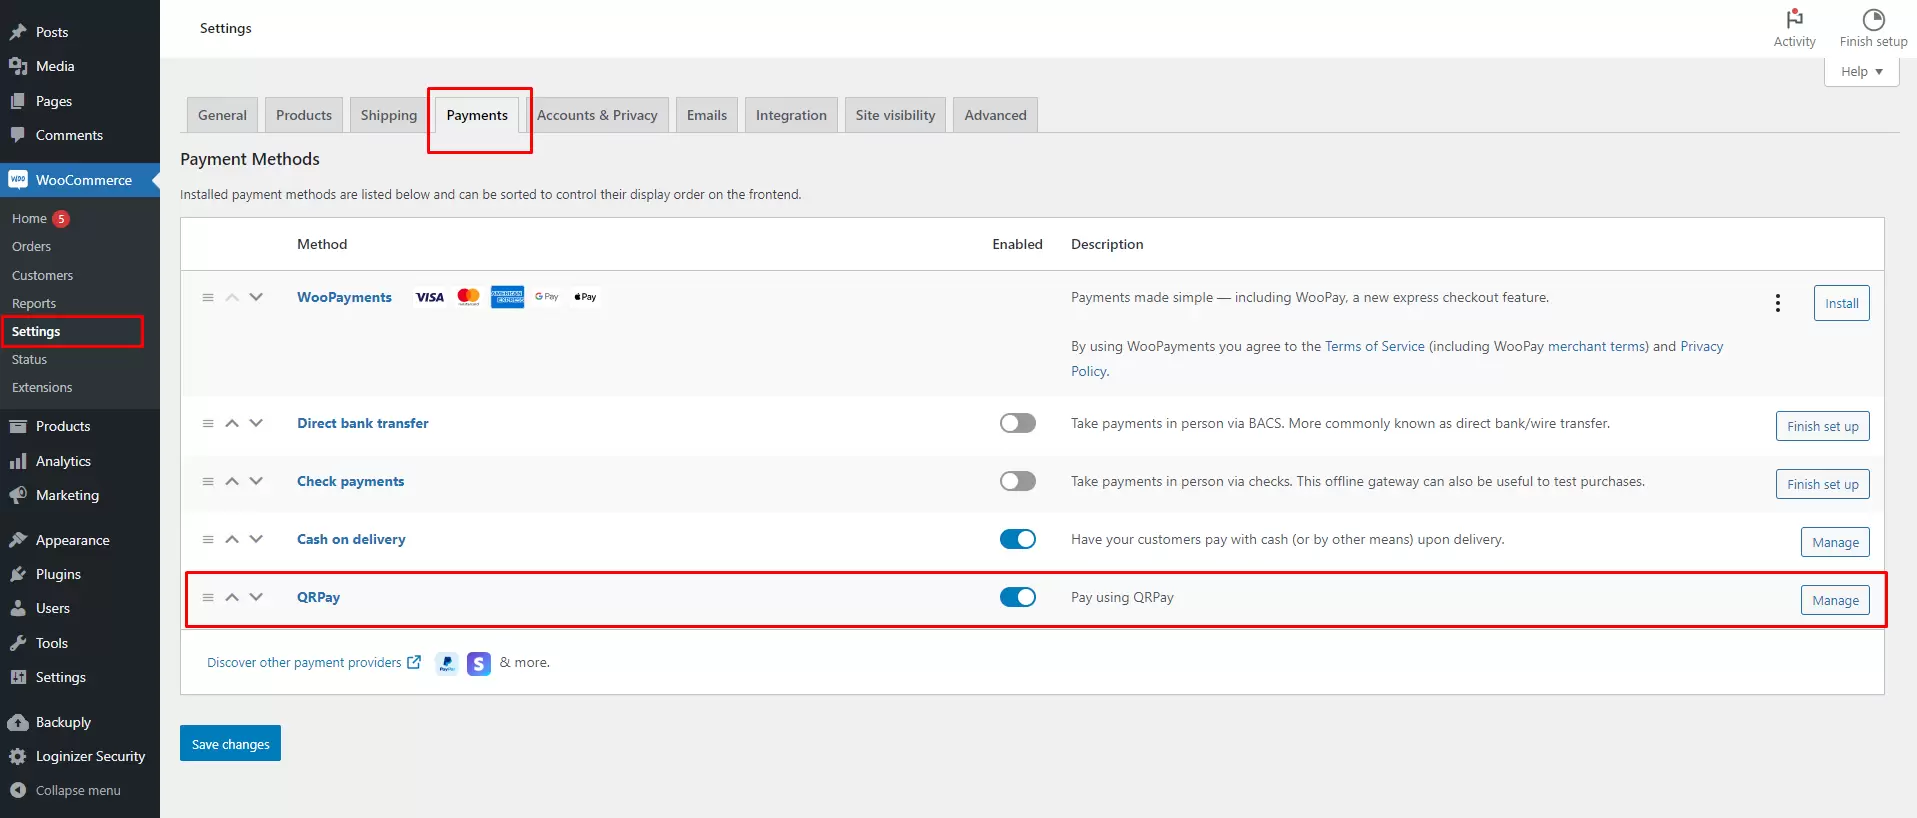
- Navigate to WooCommerce > Settings > Payments.
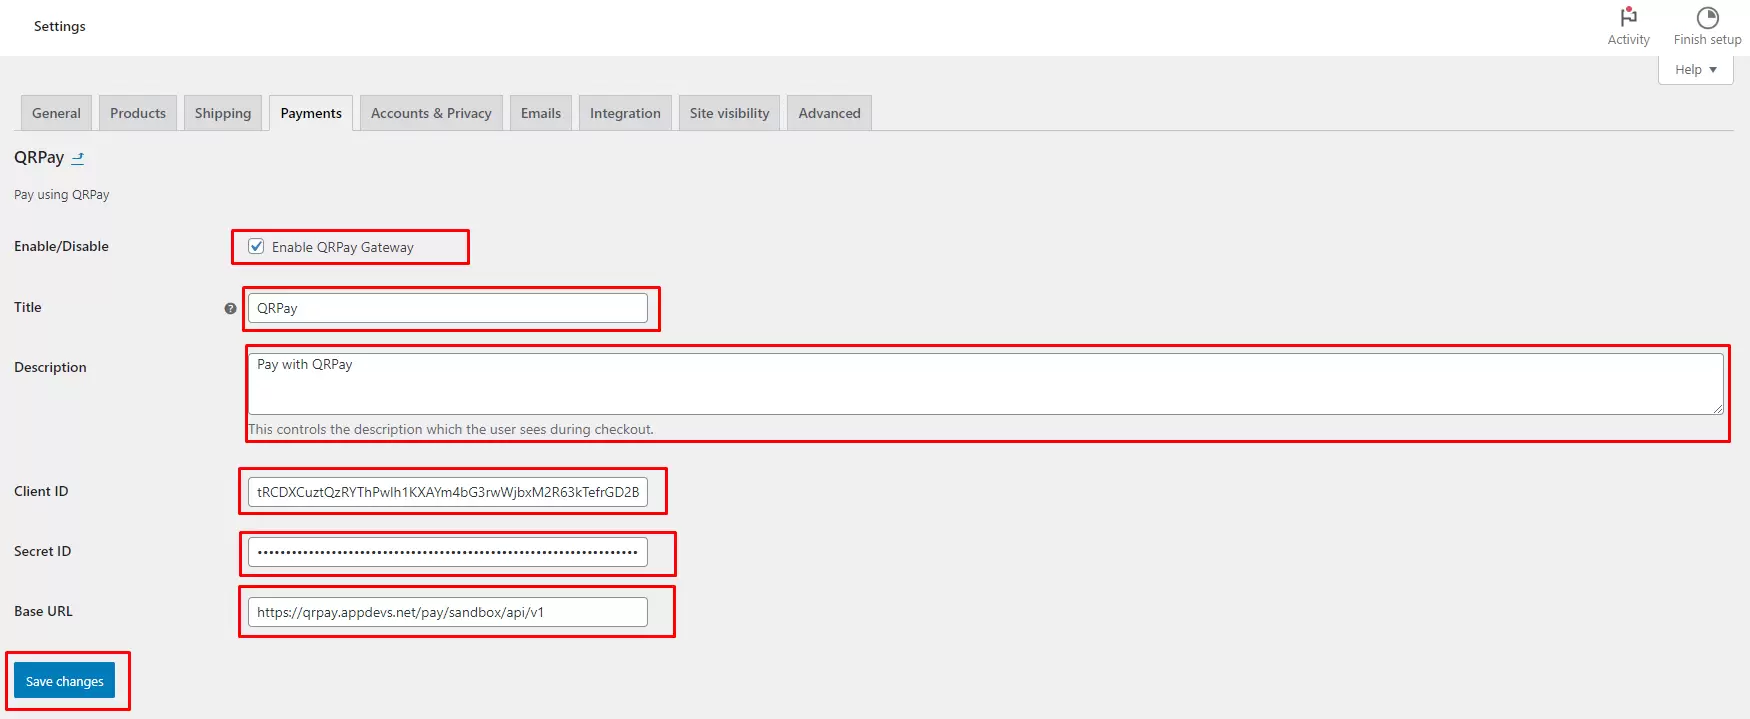
- Enable QRPay and click Manage.
- Enter your Client ID, Secret ID, and Base URL (found in your QRPay Merchant Panel under API Settings). Click Save changes.
- Crucial: Setup the Shortcode. Go to Pages > Checkout and ensure it contains:
[woocommerce_checkout]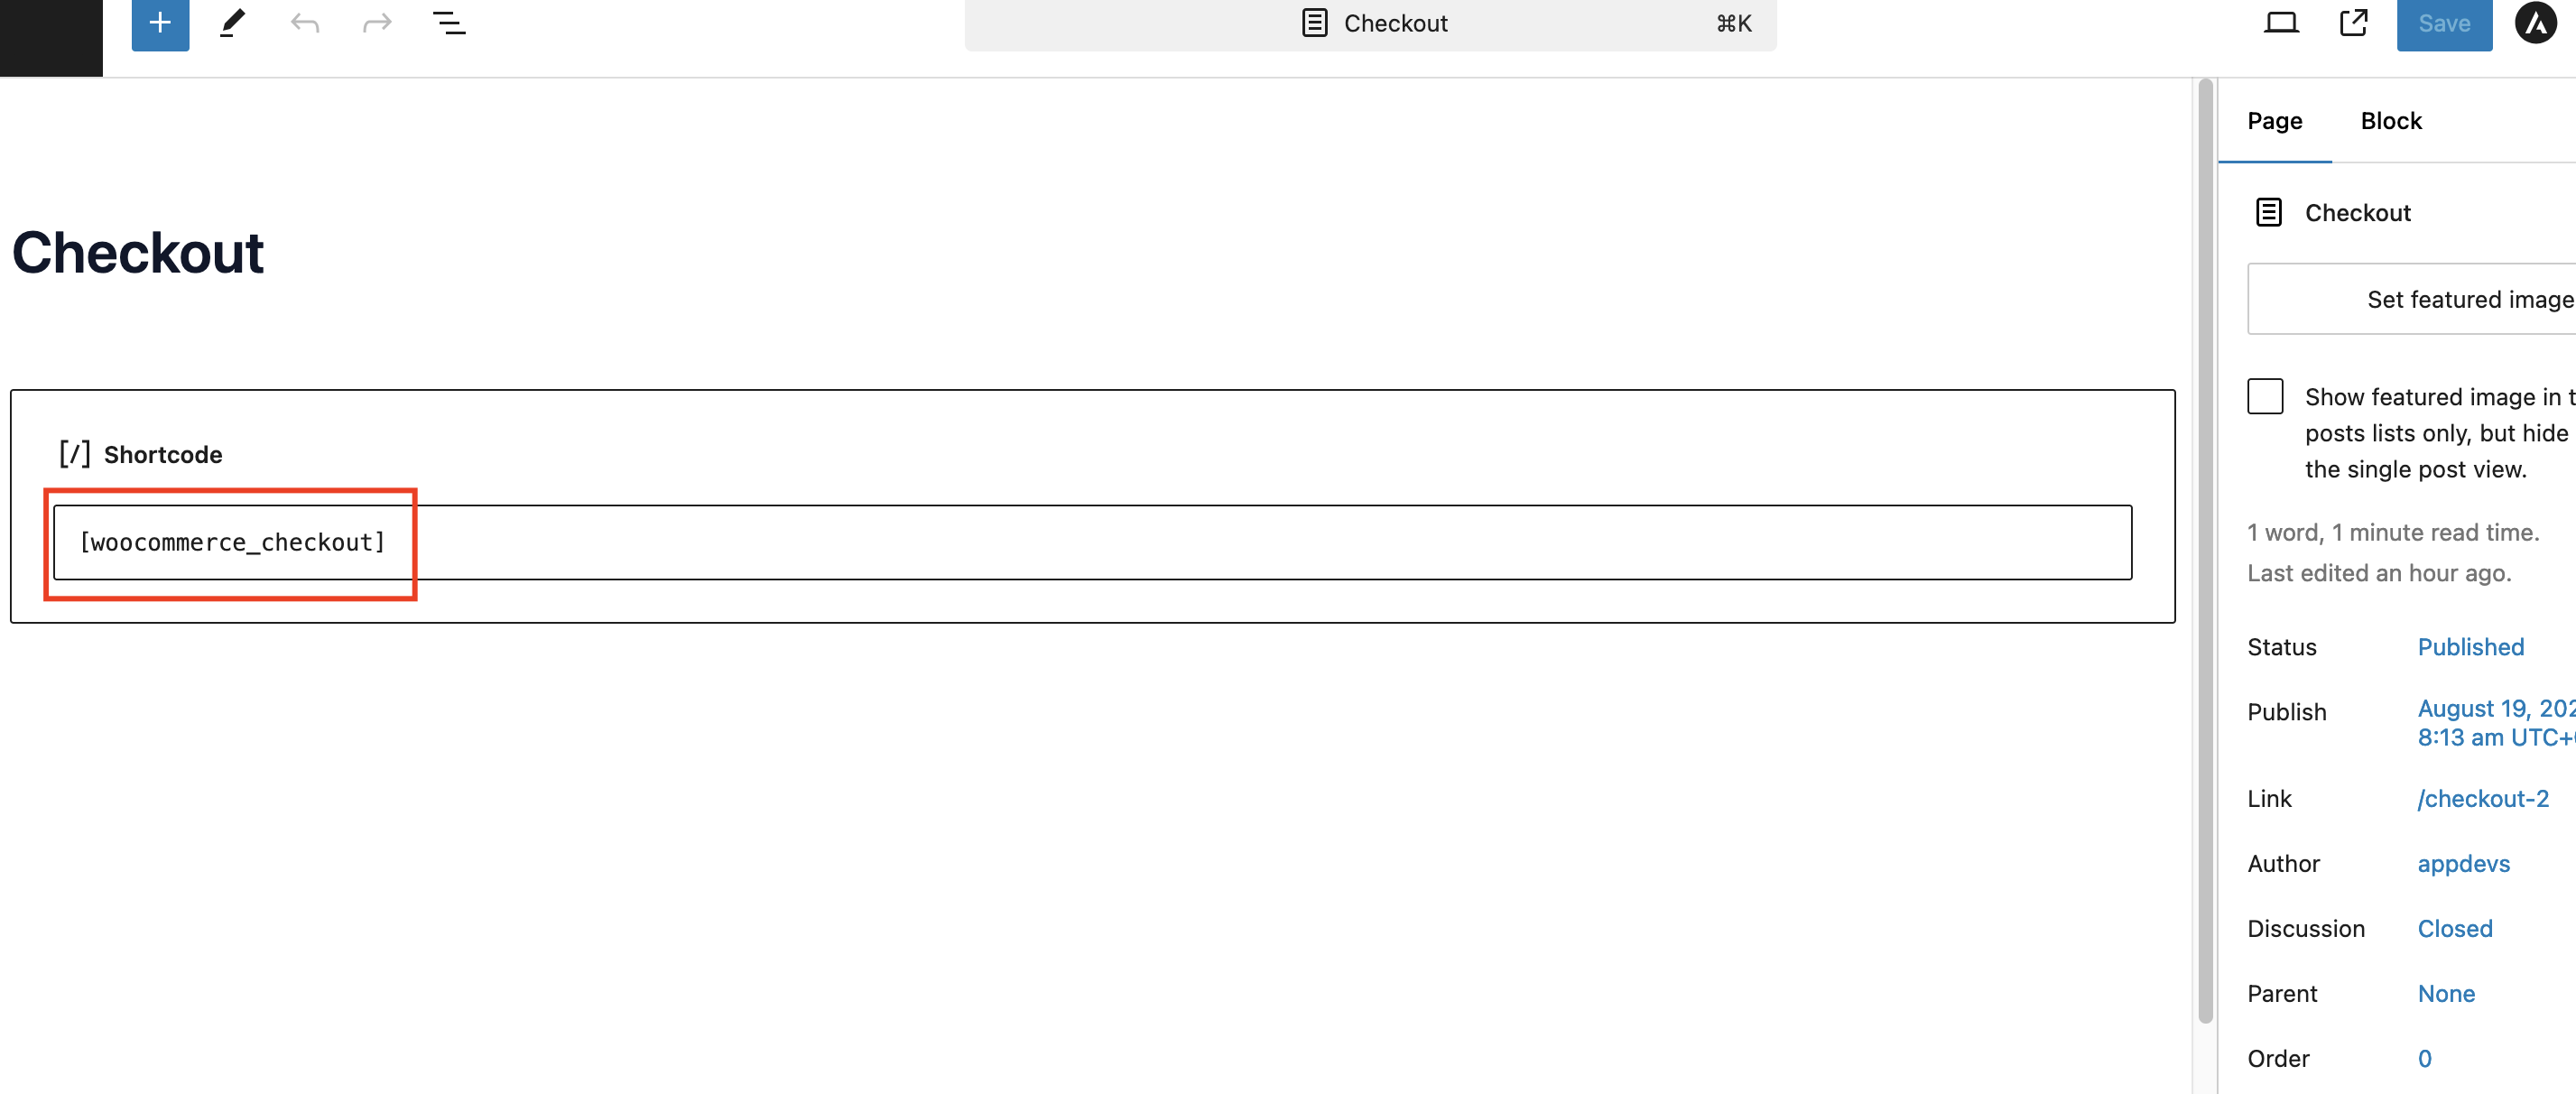
Note: The checkout page must have this shortcode to render the payment gateway correctly.
Step 5: Test a Payment
- Add a product to your cart and proceed to the checkout page.
- Select QRPay as the payment method.
- Complete a transaction (use Sandbox mode first to verify functionality).
Need Help?
If you encounter any issues during installation, please visit ourAppDevs Support Center . Our team is ready to assist you.